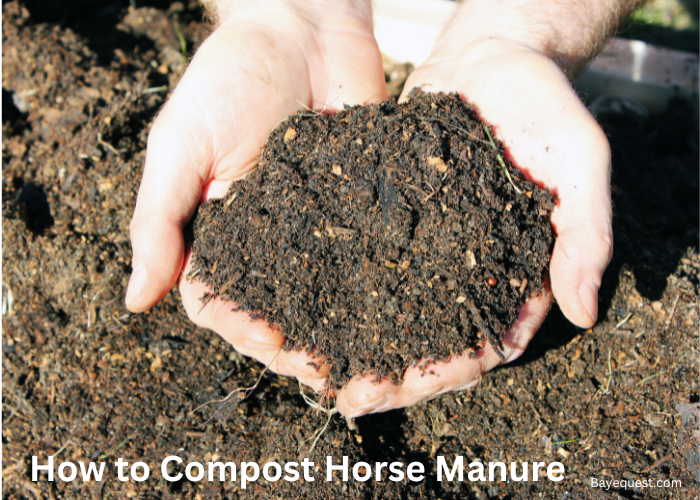
Turn your horse’s waste into rich, garden-ready compost. Composting horse manure is simple.
It’s a great way to recycle stall waste and boost soil health. The process is eco-friendly and cost-effective.
It reduces waste and creates nutrient-rich soil for plants. Your garden will thrive with this natural fertilizer.
Follow these easy steps, and you’ll see results fast. In no time, you’ll have compost that helps your plants grow strong and healthy.
Ready to get started? Let’s turn that manure into garden gold.
What is Composting Manure?
Composting manure is the process of breaking down animal waste into nutrient-rich organic matter.
It is an aerobic process, meaning it requires oxygen. Microorganisms like bacteria and fungi break down the manure through biological activity.
This process is thermophilic, meaning it generates heat. Temperatures often rise to 130-160°F (55-70°C), which kills pathogens and weed seeds.
The process is controlled by managing moisture, temperature, and airflow to speed up decomposition.
In the end, composting creates stable, odor-free, and nutrient-dense material that is safe for plants.
Why Compost Horse Manure?
Composting horse manure has many benefits.
It turns waste into a valuable fertilizer, packed with nutrients like nitrogen, phosphorus, and potassium, which improve soil health and plant growth.
Composting reduces manure volume, helping manage waste effectively and reducing odor.
It also destroys harmful pathogens and weed seeds, making the compost safer for gardens.
By composting, you reduce methane emissions and contribute to a cleaner environment.
Overall, composting horse manure is an eco-friendly way to recycle waste and create a natural, rich soil enhancer for gardens and farms.
How to Compost Horse Manure (Step-by-Step Procedure)
Composting horse manure is an easy way to turn waste into nutrient-rich soil for your garden.
Follow this step-by-step guide to create compost that helps improve soil health, boosts plant growth, and reduces waste in a sustainable way.
Step 1: Choose a compost site
Select a location with good drainage and ventilation. The site should be away from water sources to prevent runoff contamination.
Pick a spot that’s convenient to access, as you’ll need to turn and water the pile regularly.
An open, well-ventilated area helps with airflow, which is essential for the composting process.
A partially shaded spot is also ideal because it helps maintain moisture levels and prevents the pile from drying out too quickly.
Ensure the site has enough space for your pile, as well as room for tools and movement around it.
Step 2: Layer manure with carbon-rich materials
To start building your pile, alternate layers of horse manure with carbon-rich materials.
Carbon sources can include straw, hay, dried leaves, or shredded cardboard.
This combination helps balance the carbon-to-nitrogen ratio, which is key for effective composting.
Begin with a layer of manure about 6–8 inches thick. Then add a similar layer of carbon material.
Repeat this process until your pile reaches a manageable height, ideally around 4–6 feet.
Proper layering creates an environment for microbes to thrive, speeding up decomposition.
Step 3: Moisten the pile
Moisture is critical for composting. Use a hose or watering can to dampen each layer as you build the pile.
The compost should feel like a wrung-out sponge—not too dry, but not soaked. Water helps microbes break down the manure and carbon materials.
Too little moisture slows the process, while too much can cause anaerobic conditions, leading to odor.
Check moisture levels regularly, especially in hot weather, as compost can dry out quickly.
Keeping the pile moist ensures that beneficial bacteria can continue decomposing the materials efficiently.
Step 4: Cover to retain heat
Once the pile is built and moistened, cover it with a tarp or compost cover.
Covering helps retain heat and moisture, both of which are necessary for effective composting.
The cover also protects the pile from heavy rain, which could make it too wet.
Keeping the pile warm promotes the growth of thermophilic bacteria, which break down materials quickly and kill pathogens.
Secure the cover to keep it in place, but make sure there’s room for air circulation to avoid trapping excess moisture.
Step 5: Monitor temperature
Use a compost thermometer to check the temperature of your pile.
The ideal range is between 130°F and 160°F, which indicates active decomposition.
High temperatures help kill harmful pathogens and weed seeds.
If the temperature drops below this range, it may be time to turn the pile or add more manure to restart the process.
Checking the temperature every few days will help you track the pile’s progress.
Maintaining the right temperature ensures that your compost is breaking down quickly and safely.
Step 6: Turn every 1–2 weeks
Turning the pile is essential for aeration, which supports aerobic microbes and speeds up decomposition.
Use a pitchfork to mix the compost every 1–2 weeks, moving the outer layers toward the center and vice versa.
This also distributes heat evenly, helping maintain a consistent temperature throughout the pile.
Turning prevents the compost from becoming compacted and allows oxygen to reach all parts of the pile.
Regular turning keeps the composting process active and reduces odors, resulting in a faster, more effective breakdown.
Step 7: Add water as needed
Composting requires a consistent moisture level. Check the pile’s moisture each time you turn it, adding water if it feels dry.
Aim for a damp consistency, similar to a sponge that’s been wrung out.
Avoid over-watering, as excess moisture can slow decomposition and cause foul odors.
If your pile is too wet, consider adding more dry carbon material like straw or leaves to absorb moisture.
Proper hydration keeps the microbes active, ensuring efficient composting without unwanted smells.
Step 8: Repeat until compost is earthy and stable
Continue turning, monitoring temperature, and adding water as needed. Over time, the pile will change in appearance and texture.
The compost will become dark, crumbly, and have a rich, earthy smell. This is a sign that decomposition is nearly complete.
Depending on conditions, this process can take several months. Patience and regular maintenance ensure that your compost reaches a stable state.
When your compost no longer resembles manure or straw and has a uniform, soil-like texture, it’s ready for the final stages.
Step 9: Let it cure
Once the composting process is complete, allow the pile to cure.
Curing lets any remaining organic material break down fully, making the compost safe for plants.
Leave the pile undisturbed for a few weeks, ensuring it is well-aerated but doesn’t require regular turning.
This final stage stabilizes the compost, so it won’t decompose further when added to your garden.
Curing helps balance pH and ensures that all nutrients are available to plants, creating a nutrient-rich, mature compost.
Step 10: Use in the garden
Your compost is now ready to use. Spread it over garden beds, mix it into soil, or apply it around trees and shrubs.
Compost enriches soil with essential nutrients, improves structure, and increases moisture retention.
When using compost on edible plants, wait a few weeks after application to allow nutrients to integrate fully.
Adding compost to your garden enhances plant growth and soil health naturally, making it a sustainable way to improve your landscape.
Enjoy the benefits of your homemade compost as it nourishes your garden and helps plants thrive.
How Long Does it Take to Compost Horse Manure?
Composting horse manure takes 3 to 6 months when managed actively.
Several factors influence the timeframe, including pile size, temperature, moisture, and how often you turn it.
In a well-maintained pile with regular turning and proper moisture, decomposition happens faster, often in 3–4 months.
If conditions aren’t ideal the process can slow down, taking up to 6–12 months to complete.
By keeping the compost warm (130–160°F), moist (like a wrung-out sponge), and aerated, you’ll speed up the process and ensure you have usable compost sooner.
How Do You Know When the Compost Is Ready?
You can tell compost is ready when it has a dark, crumbly texture and an earthy smell.
The materials should be broken down so well that individual pieces of manure, straw, or bedding are no longer recognizable.
Temperature is another indicator: a ready compost pile will have cooled down, signaling that active decomposition has slowed.
If you squeeze a handful, it should feel moist but not wet, and it should hold together loosely.
Additionally, mature compost won’t heat up again when turned.
These signs mean it’s stable and ready to use in your garden.
Composting Horse Manure Techniques
There are several techniques for composting horse manure, each with unique advantages.
Here are some popular methods:
Static pile composting
This involves creating a stationary compost pile where materials are layered and left to decompose.
Still, moisture and temperature must be monitored. It’s a low-maintenance option ideal for small-scale composting.
Turned windrow composting
Commonly used in larger operations, this method involves forming long, narrow piles (windrows) that are turned frequently with a machine.
The regular turning helps aerate the pile, speeding up decomposition and creating uniform compost.
Aerated Static Pile (ASP) composting
ASP uses a system of pipes or fans to pump air through the pile, eliminating the need for frequent turning.
This method speeds up composting, produces consistent results, and is ideal for managing large volumes of manure efficiently.
Hot composting
By maintaining higher temperatures (130–160°F), hot composting breaks down manure quickly and kills pathogens and weed seeds.
This method requires careful monitoring of moisture, temperature, and regular turning but produces compost in a short timeframe.
Cold composting
Cold composting takes a more passive approach. The manure and bedding are left to decompose over a longer period (6–12 months or more) without frequent turning.
It’s a slower process but requires little maintenance, making it suitable for smaller operations with fewer time constraints.
Optimal Conditions for Composting
Optimal composting conditions ensure fast, efficient breakdown of materials, creating nutrient-rich compost for healthy soil.
The conditions are:
Nutrients
Microorganisms need nutrients, mainly nitrogen and carbon, to grow and break down materials.
Nitrogen supports protein synthesis in microbes, while carbon provides energy. A balance of these nutrients ensures efficient composting.
Oxygen availability
Composting is an aerobic process, meaning it requires oxygen. Oxygen allows aerobic microbes to thrive, speeding up decomposition.
Without enough oxygen, the process slows and can produce foul-smelling anaerobic conditions.
Moisture
Microbes need moisture to break down organic matter. Optimal moisture for compost is 40-60%—similar to a wrung-out sponge.
Too much moisture reduces oxygen flow, while too little slows microbial activity.
Temperature
Composting works best at thermophilic temperatures (130-160°F). High heat accelerates breakdown, kills pathogens, and destroys weed seeds.
Maintaining this temperature range keeps composting efficient and safe.
Carbon-to-Nitrogen (C:N) Ratio
The ideal C:N ratio is about 25-30:1. This balance ensures microbes have enough energy (carbon) and protein (nitrogen) to function well.
Too much nitrogen can cause odor, while too much carbon slows decomposition.
How to Troubleshoot Composite Pile Problems
Keeping a compost pile healthy can be tricky, with issues like odors or slow breakdown.
This table outlines common compost problems, their causes, and easy fixes to keep your compost thriving.
| Problem | Symptoms | Solution |
| Too much moisture or excess nitrogen | Foul odor (rotten or ammonia) | Add dry carbon-rich materials (straw, leaves). Turn the pile for aeration. |
| Lack of nitrogen or insufficient size | Compost pile is cool | Add nitrogen-rich materials (manure, greens). Increase pile size and insulate if needed. |
| Low moisture | Pile is too dry | Add water gradually until it feels like a wrung-out sponge. |
| Lack of oxygen or improper Cratio | Pile not decomposing | Turn the pile to increase airflow. Adjust Cratio with balanced materials. |
| Exposed food scraps or low temperature | Presence of pests or flies | Bury food scraps deeper and cover with compost. Ensure proper heating by adjusting moisture and aeration. |
| Fungal growth, often beneficial | White or gray mold visible | No action needed—indicates healthy decomposition. |
| Excess nitrogen or overly large pile | Pile temperature too high | Turn the pile to release heat. Reduce nitrogen input or decrease pile size. |
Do’s and Don’ts for a Small-Scale Composter
Do
Balance carbon and nitrogen. Aim for a carbon-to-nitrogen ratio of about 30:1 by mixing “browns” (leaves, straw) and “greens” (manure, kitchen scraps).
Turn the compost regularly. Turning every 1–2 weeks provides oxygen, helping decomposition and preventing foul odors.
Monitor moisture. Keep the pile as moist as a wrung-out sponge to support microbial activity without creating soggy conditions.
Chop large materials. Smaller pieces of compost materials break down faster, helping speed up the process.
Cover the pile. A tarp or cover keeps the compost warm and moist while preventing excess rain from soaking the pile.
Don’t
Add meat or dairy. These can attract pests and produce strong odors, slowing down the composting process.
Ignore odors. Bad smells indicate problems like poor aeration or too much nitrogen. Adjust by adding carbon materials and turning the pile.
Let it get too dry or too wet. Dry compost slows down, and wet compost can become anaerobic and smelly. Check moisture levels often.
Add weeds with seeds. Seeds can survive the composting process and sprout in your garden later.
Use chemically-treated materials. Grass clippings or plants treated with pesticides or herbicides can harm the composting process and damage garden plants.
The Compost Bin Vs Compost Pile
A compost bin and a compost pile are both effective ways to compost, but they differ in setup and management.
A compost bin is a contained structure, usually made of plastic, metal, or wood, that holds compost materials within a closed space.
Bins are tidy and help contain compost in smaller areas, making them ideal for limited spaces like backyards or urban gardens.
They keep pests out and help retain heat, which speeds up decomposition.
Compost bins are also visually appealing and prevent the pile from spreading.
However, bins can limit airflow and may require more frequent turning to keep the compost aerated.
In contrast, a compost pile is an open heap of compostable materials, often layered directly on the ground.
Piles are easy to start, as they don’t require any special structure or container.
With better air circulation, a compost pile can decompose efficiently with less frequent turning.
Piles are also flexible in size, making them suitable for larger amounts of yard waste or manure.
However, an open pile is more exposed, which can attract pests and may dry out quickly in hot weather, requiring regular moisture checks.
Both methods can produce rich, usable compost. For those with space and looking for a low-maintenance option, a compost pile might be the best choice.
If containment, cleanliness, and pest prevention are priorities, a compost bin could be more suitable.
How to Use Composted Horse Manure in Your Garden
Composted horse manure is a rich, natural fertilizer that can improve soil health and boost plant growth in your garden.
To use it effectively:
1. Prepare the soil
Before adding composted manure, loosen the soil where you plan to use it.
Tilling or lightly digging the area ensures the compost will blend well and reach the root zones of plants.
2. Apply as a soil amendment
Spread a 1- to 2-inch layer of composted manure over garden beds. For new plantings, work it into the top 6 inches of soil.
This helps improve soil texture, aeration, and water retention.
3. Use as mulch
Composted horse manure can be used as a mulch to regulate soil temperature, suppress weeds, and retain moisture.
Apply a layer around established plants, keeping it a few inches away from stems to prevent rot.
4. Feed flowering plants and vegetables
For nutrient-loving plants like tomatoes, peppers, and roses, add a handful of composted manure around the base during the growing season.
It provides a slow-release nutrient boost.
5. Enrich lawns and grassy areas
Spread a thin layer (¼ to ½ inch) of composted manure across your lawn or grassy areas.
This improves soil structure and provides essential nutrients for healthy, green growth.
6. Prepare potting mixes
Mix composted horse manure with regular soil or potting mix in a 1:3 ratio for container plants.
This improves the mix’s nutrient profile and helps retain moisture.
7. Avoid overuse
Composted manure is nutrient-rich, so use it sparingly to avoid excessive nutrient buildup, which can harm plants.
Apply no more than once or twice per season for most garden areas.
How Do You Compost Horse Manure? Conclusion
Composting horse manure is a simple and rewarding process. With the right care, you can turn waste into valuable compost for your garden.
Not only will you boost your plants’ health, but you’ll also help the environment.
So, grab that manure and start composting—it’s nature’s way of recycling.
Also, check out our blog on why horses eat poop to understand this curious behavior and its possible causes.


